...which of course means there's no where to install a bracket to hold the curtain rod. I actually considered drilling a hole in the wall the same diameter of a drapery rod and just sliding it through and attaching the finial inside the closet, but that would just look weird. So I'm building simple cornices instead. On the plus side, this should save me a bit of money, because I can use those simple (and uber-cheap) cafe rods and rings to hang the curtains under the cornice.
Building a cornice is pretty easy, if you're not afraid of power tools. I'm sure there are scads of other "how-tos" on the web, but I'm going to do a blow-by-blow of my method anyway. (Mostly to kill time, since I haven't gotten any farther than my paper cut-outs!)
My design for the cornices comes from the shape I've chosen for the upholstered headboard I'll be making. Initially, I thought I wanted a very simple, rectangular headboard, but then I saw this...
and realized that was IT. Actually, I love the entire bed, but I don't have a cool platform bed like that, and my bedding is obviously not as minimalist. I do love the minimalist look I've been seeing in a lot of bedding over the past five years or so, but I always seem to opt for pillows, pillows, and then another pillow or two for good measure. Nonetheless, I think the headboard shape is going to work well in The Room, so I'll be repeating it in the cornices.
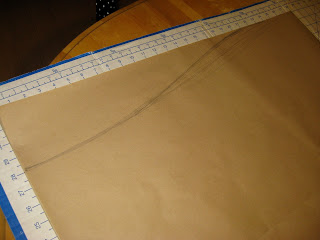
To get a pleasing and symmetrical curve I just use some brown kraft paper, cut out a rectangle the same width as the finished cornice, draw a straight line down the center and start drawing curves to meet the line...
That top curve was waaaaay too pronounced; then I realized why - I hadn't cut my rectangle to the proper height! I want the cornices to be nine inches at the outside edges and twelve inches at the deepest point in the center, which corresponds to the lower penciled curve. When I had what I felt to be a pleasing curve, I folded the paper in half along the center line and cut it out...
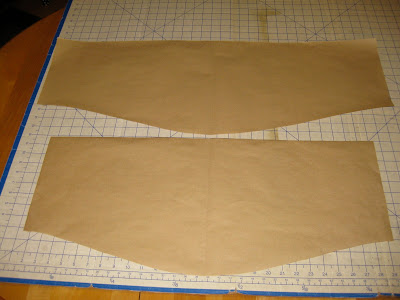
Then I did the same thing for the slightly larger cornice that will be needed on the second window, and I have my two patterns...
Then, so long as I had my handy-dandy pattern board out, I decided I may as well make up the pattern for the headboard as well. First, I took the pattern board up to the room and balanced it on the bed to get a sense of the size I was going to need...
And as luck would have it, the pattern board itself was just about the perfect size, so I just took my pencil and started drawing the curve right there in place to get a sense of it.
Then I pieced together some brown kraft paper so I had a 56" x 32" rectangle....
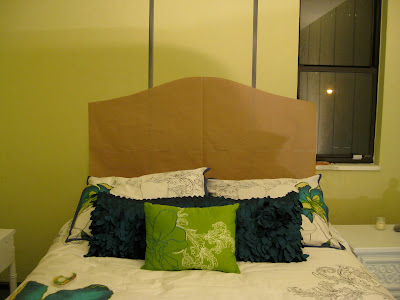
and drew my curve, cut it out and ran upstairs to tape it in place. Whereupon I felt like I had tumbled into the tale of Goldilocks and the Three Bears...
Goldilocks thought the center top of this curve was too flat.
Goldi thought the overall curvature of this one wasn't pronounced enough.
Goldi thought this was just right! Last night, that is. Today, Goldi much prefers version number two, so it's back to the drawing board. I my need to re-cut the cornice board patterns as well, as I just feel the curves are now too pronounced and lending yet another feminine air to the room.
Once my patterns are perfected, I'll lay them down on the wood of my choice, trace them out with a marker and cut them out using a jig-saw/saber-saw. I'm a bit on the fence about the wood right now. For the headboard, I'll just use a piece of either 1/2" or 3/4" thick C-grade plywood. Since it will be upholstered, the wood just needs to be sturdy, and plywood offers that quality. For the cornices, I would really love to use a couple of scraps of plywood I have in Studio A, but they're also C-grade which is not really suitable for painting (I intend to paint the cornices rather than upholster them). On the other hand, I'm going to be doing some dimensional stenciling on them as well (using Liquitex Modeling Paste rather than drywall mud), so that may solve the problem of the face not being smooth. I'll have to do a trial run to see if the plywood will work. Hopefully, I'll have that figured out and the remainder of my goofy little cornice tutorial ready by tomorrow. Believe it or not, I do expect to have the cornices and headboard finished by week's end, and the curtains started, if not finished. I guess I should quit dallying here and get busy, huh?
Manana!


I'm with last night's Goldi- I like #3 the best. As far as the furniture goes- I like them both, but I adore the night stand. I would buy that in a heartbeat. Great job, Deb- your room is really coming together.
ReplyDelete